What does a Mouth Swab look like?
A mouth swab is similar to a cotton bud with a cotton-ended part on a single end of the stick. The swabs are sent to you in sterile packaging and it is crucial to handle them in a clean environment with clean hands.
Tips for Successful Saliva Sampling:
- Follow the instructions provided carefully.
- It is important to make sure that the swab sample is correctly labelled with the name of the donor and any other information requested.
- To avoid contamination of the sample it is of utmost importance not to touch the cotton ended part of the swab and to keep swabs from different test participants separate.
- We provide 4 swabs for each person. Make sure to use all 4.
- Avoid eating, drinking and smoking for one or two hours before sampling as food and drink may compromise the quality of the sample. You may drink water.
In the case of infants requiring their mouths to be swabbed, again it is important that at least an hour has elapsed since the infants’ last feed and to rinse their mouth with lukewarm water prior to rubbing the swab inside their mouth.
Using Mouth Swabs
Step 1
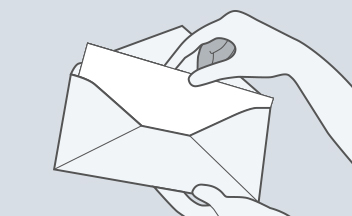
You will find 2 pairs of swabs enclosed in paper envelopes. Remove the swabs from inside the envelope. Each pair of swabs is in turn sealed in a wrapper. Remove and discard the wrapper ensuring to keep the swabs and the envelopes.
Step 2
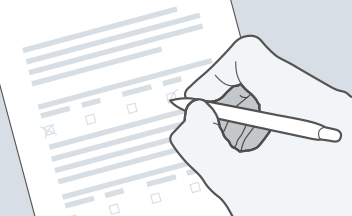
Complete the required information on the swab envelopes. You may fill out all the required details, making sure to write everything legibly and in block capital letters. The larger envelope also contains a consent form.
Step 3
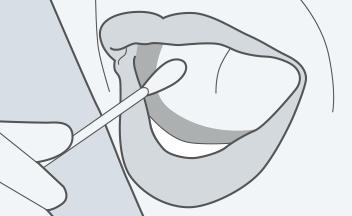
Take one of the 4 mouth swabs and rub it inside the mouth against the cheek to collect saliva sample (always inside the mouth). You need to do this for 1 minute per swab. Repeat using remaining swabs, ensuring to swab all test participants and to use all the swabs.
Step 4
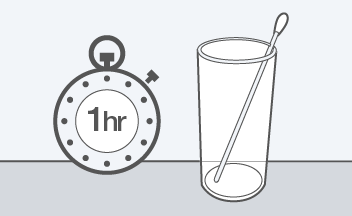
Now it’s time to let the swabs dry. In order to make sure there is no contamination from swabs belonging to different people coming into contact with each other, we suggest placing swabs from each test participant in separate, clean drinking glasses with the cotton ended part of the swab pointing upwards. Leave the swabs in this position for an hour. Once dry, place the swabs back into their respective envelopes.
Step 5
The final stage is to get everything ready for posting. Place the envelopes containing the swabs into the larger pre-addressed envelope, include the completed consent form. Affix a postage stamp and send everything off for testing. We recommend using a tracked postal service or courier.
Once we Receive Your Samples
Once we receive your samples, we will send you a confirmation email and you will be given the date when your results will be completed. Results are issued by email as standard or by email and hard copy for an added cost.